Marty McFly 2015 Costume Build
- Sep 1, 2017
- 5 min read
This costume build included making the Nike Airmags, the Hoverboard, and the jacket, the hat was purchased. I had to do a lot of screeshot scrutiny to get the details for this build. I also referenced as much as I could, other builds and the actual hero props where I could find them online. Super fun build!


For the Hoverboard, I actually started with just a regular skateboard deck. My plan was to keep it as a skateboard (paint the wheels and trucks black) so that I could actually ride the board when I went to display the costume.
I first cut off the front part of the board where it bevels up. Then I squared off the other side but was careful to keep a lip on it. I then found a great neon pink spray for the board. Then I got as many screen shots as I could and in Illustrator, I designed the overall top and bottom design. I printed these out on a card stock weight paper and paneled them onto the board with adhesive spray. Once they were fixed to the board, I finished it with a clear satin spray. Then I cut out the bottom "hover" attachments in foam and painted accordingly. I hot glued everything in place. As for the actual hover pads, I made molds and filled them with melted hot glue. The texture wasn't as smooth as I wanted but I really wanted to get the right shape and I didn't have experience (or the money) with resin castings at this point. Either way, the shape was good enough. I gave them a good spray of silver paint and then attached them to the board with hot glue.
I added the top foot base made from foam and cardboard and then painted green. I then found a white fake fur material that I colored by adding pink chalk dust to the fur. This actually worked well and it didn't really leave any residue. I then just added the black circle (where the handle would have gone) and added the black trucks and wheels.

For the jacket, I found a windbreaker from the local goodwill. I added the red shelving foam that you can buy and paneled these sheets up and down the front and back of the jacket.
I had a hard time figuring out the sleeves and cuffs. I decided to go with this corrugated plastic tubing that is found in the plumbing dept at your local hardware store. I then cut sections of this tubing and pieced them out to closely resemble the cuffs.
The Front pockets were actually sewn material that I attached with hot glue, I added the red foam and then cardboard covered in a black material for the fronts of the pockets.
As for the sleeves, I made the upper attaching pieces from foam, that wasn't too difficult. I just had a real challenge figuring out the center part of the sleeves where they bunch up. I believe the real hero jacket had rubber sleeves. I used a black material and then inserted some cardboard rings in the sleeves. It didn't give me what I was looking for but I was running out of time so it had to do.
One other cool thing that I did for the jacket was I recreated the talking aspect of the jacket from the movie. I found a greeting card that you can program yourself, pieced it out and recorded the sound bites from the movie where it says "Jacket is drying...Your jacket is dry". This was then inserted into the jacket and could be pressed to make the sound effects.
On a side note, I used mainly hot glue to attach most of the jacket together. It is very visible throughout the foam mesh material and was pretty messy. It really took away the clean look that I wanted from this jacket build. If I were to do it again, I would definitely sew everything together. And I would find some metal wires to create an infrastructure for the inner sleeves.

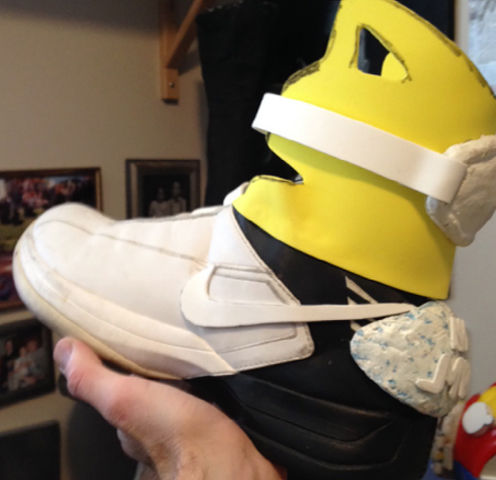
The Nike Airmags were fun to make as well. I started with some basic Nikes that I found at Goodwill.
I cut off the tounge and added the basic structure made from foam. I then reattached the tounge and create the 'laces' out of foam.
I then made basic molds for the pieces found on the back of the shoe. I filled the molds with melted hot glue. I painted the Nike lettering on the front and attached velcro for the straps.
I cut out parts of the bottom of shoes to add some blue LED lights that I found on Ebay. I created molds and made the bottom side pieces to be translucent enough for the blue lights to come through. I made the button activated blue lights work in a way that one in each shoe would stay on static and then each shoe would have a light that was pressure actived with every step. I then gave the shoes the grey/white paint job. I added the blue flicks as well.
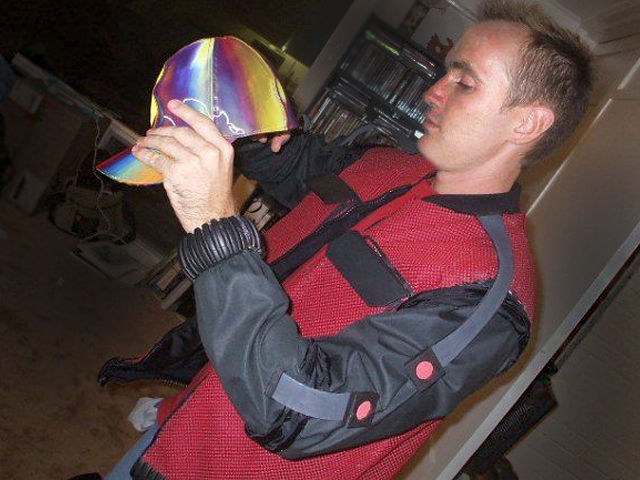
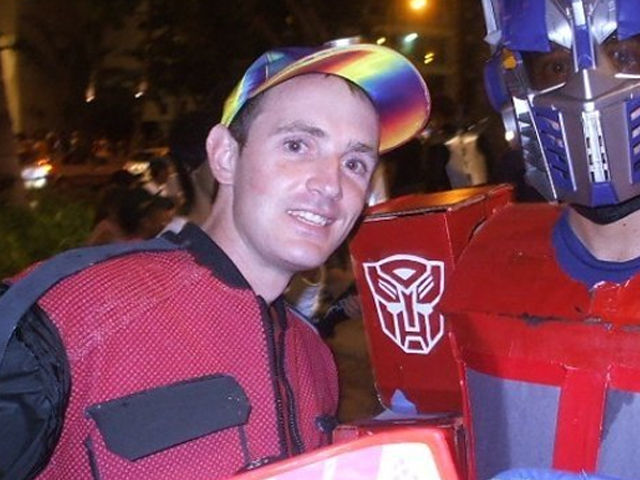
The hat was purchased online. It fit smaller than I anticipated so I had to undo the stiching on the back to make it fit.
the red T-shirt was found at Goodwill as well as the jeans with the pockets turned out.
Overall, I was happy with this build. I learned a lot and would do many things different if I were to build this again. But it was a fun build and maybe one day I'll create a 2.0 version of everything.

My dad wanted to be Marty for Halloween for a work party one year so I had to make some new Airmags for him.
I did the same process for this build but made a few tweaks. I used cloth this time for the inside of the shoes and actually cut out the letters (and swoop) for the NIKE MAGS to be placed on the back of the shoes. I was able to extend the tongue a bit longer on these shoes to make them look a bit more accurate. Unfortunately, because of the wear and tear, the foam straps didn't last too long on these shoes and they fell apart. So I'm not sure if I have any other photos of these shoes before they were worn.
One day I'd like to build these shoes with more sturdy material and with all of the LEDs attached.
I also updated the board a bit. I have taken off the trucks and wheels and made it a little more screen accurate. I also broke out my Gray's Sports Almanac. My dad was the hit of the party!


Comments